
Kohler Shower Valve Installation Manual: A Comprehensive Guide
This manual provides detailed instructions for installing various Kohler shower valves, covering general procedures and specific model guidance. It emphasizes safety, proper preparation, and post-installation checks.
Accessing online resources, like KOHLER’s video guides, can greatly assist with the installation process, especially for digital systems like DTV.
Understanding Kohler Shower Valves
Kohler shower valves are renowned for their reliability and ease of installation, making them a popular choice for bathroom renovations and new constructions. These valves regulate water flow and temperature, delivering a consistent and comfortable showering experience. Understanding the core components and functionality is crucial before beginning any installation work.
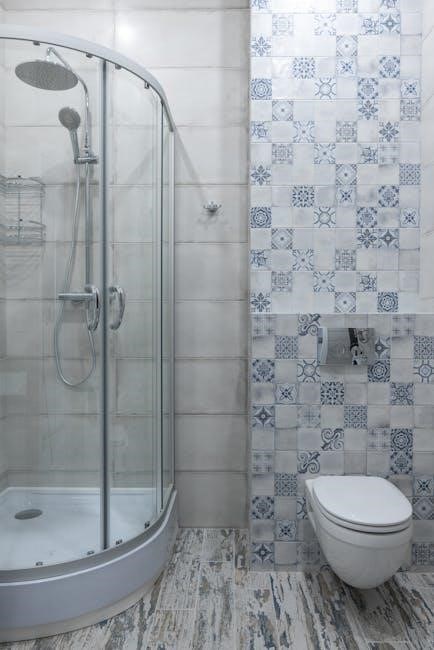
Kohler valves utilize pressure-balancing technology, ensuring a stable water temperature even with fluctuations in household water pressure. This prevents scalding or sudden temperature changes, enhancing safety. Different valve types cater to various preferences, from traditional manual controls to advanced digital interfaces. Familiarizing yourself with these distinctions will help you select the appropriate valve for your needs.
The valves consist of a valve body, cartridges, escutcheon plates, and handles. The cartridge controls water mixing and flow, while the escutcheon plate provides a finished aesthetic. Properly identifying each component is essential for a successful installation. Furthermore, understanding the valve’s internal mechanisms aids in troubleshooting and maintenance.
Types of Kohler Shower Valves
Kohler offers a diverse range of shower valves to suit various bathroom designs and user preferences. The Rite-Temp valve is a classic choice, known for its precise temperature control and durable construction. It features a pressure-balancing mechanism for consistent water delivery.
The Purist valve embodies a minimalist aesthetic, offering clean lines and a modern look; It’s ideal for contemporary bathrooms and provides reliable performance. For those seeking a luxurious and technologically advanced experience, the Digital Shower Valve (DTV) offers customizable settings and remote control capabilities.
Beyond these core models, Kohler also provides transfer valves for multiple showerheads and volume controls for adjusting water flow. Understanding the specific features of each valve type is crucial for selecting the best option for your needs. Consider factors like desired aesthetic, functionality, and budget when making your decision. Each valve requires a slightly different installation approach, so knowing the type is paramount.
Essential Tools and Materials
Before commencing your Kohler shower valve installation, gathering the necessary tools and materials is paramount for a smooth and efficient process. Essential tools include a pipe wrench, adjustable wrench, screwdriver set (Phillips and flathead), and a basin wrench for tight spaces.
A Teflon tape roll is crucial for sealing threaded connections, preventing leaks. You’ll also need a soldering torch and solder if working with copper pipes, along with flux. A pipe cutter or hacksaw is necessary for modifying pipe lengths. Safety glasses and gloves are non-negotiable for personal protection.
Regarding materials, ensure you have the correct Kohler shower valve model, appropriate supply lines (copper, PEX, or CPVC), and a new escutcheon plate. A vacuum breaker arrestor, like the Sioux Chief 652-AD, is recommended for remote valves. Don’t forget plumbers putty for sealing around the escutcheon and a level to ensure proper valve alignment. Having these items readily available will streamline the installation.

Pre-Installation Preparation
Prior to installation, thoroughly review all instructions and warnings within the Kohler guide. Ensure complete understanding of operation and safety protocols before beginning work.
Safety Precautions
Prioritizing safety during Kohler shower valve installation is paramount. Always adhere to all warnings, cautions, and instructions detailed within the provided installation guide. Before commencing any work, meticulously read and comprehend all documentation to prevent potential hazards.
Exercise extreme caution when dealing with water lines; ensure the water supply is completely shut off to avoid unexpected flooding or water damage. Protect your eyes by wearing safety glasses to shield against debris and potential splashes. If soldering is required, work in a well-ventilated area and take necessary precautions to prevent burns.
Be mindful of the weight of the valve and associated components to avoid strain or injury. If working in a confined space, ensure adequate lighting and ventilation. Keep children and pets away from the work area to prevent accidental exposure to tools or materials. Always disconnect any electrical power sources before working near electrical components, particularly with digital shower systems. If unsure about any aspect of the installation, consult a qualified plumber for assistance.
Remember, a safe installation is a successful installation.
Shutting Off Water Supply
Before initiating any Kohler shower valve installation, completely shutting off the water supply is absolutely critical. Locate the main water shut-off valve for your home – typically found near the water meter or where the water line enters the building. Turn this valve clockwise until it’s firmly closed, halting water flow to the entire house.
Next, identify the individual shut-off valves dedicated to the shower or bathroom. These are often located behind an access panel or in an adjacent room. Close these valves as well, providing an extra layer of security against water leakage during the installation process.
After closing all relevant valves, open the existing shower valve to relieve any residual water pressure within the pipes; Have a bucket and towels readily available to catch any remaining water that may drain from the lines. Double-check that no water is flowing from the showerhead before proceeding with the removal of the old valve or commencing the installation of the new one. Confirm complete water shut-off to prevent potential flooding and ensure a safe working environment.
Removing Existing Valve (If Applicable)
If replacing an existing Kohler shower valve, careful removal is essential. Begin by removing the escutcheon plate, typically held in place by screws or a snap-fit mechanism. Once the plate is off, you’ll access the valve trim and handle. Unscrew or detach these components, noting their order for potential re-use or reference.
Using a pipe wrench, carefully loosen the valve body from the water supply lines. Be prepared for some residual water to escape, even with the water supply shut off. Have a bucket and towels handy to contain any spills.

If the valve body is corroded or difficult to remove, apply penetrating oil and allow it to sit for a while before attempting again. Avoid excessive force, as this could damage the surrounding plumbing. Once the valve body is free, inspect the surrounding wall for any water damage or mold. Clean the area thoroughly before proceeding with the installation of the new Kohler valve.

Installation Steps: General Procedure
The core process involves installing the valve body, securely connecting water lines, and finally, fitting the escutcheon plate. Follow manufacturer instructions closely for optimal performance.
Step 1: Installing the Valve Body
Begin by carefully applying pipe thread sealant to the valve body’s threads, ensuring a watertight seal when connected to the water supply lines. Position the valve body within the shower wall opening, aligning it according to the manufacturer’s specifications and ensuring it’s level.
Secure the valve body using appropriate mounting brackets or screws, tightening them firmly but avoiding over-tightening, which could damage the valve or surrounding wall. Double-check the valve body’s orientation to confirm hot and cold water connections align with the existing plumbing.
For remote valve installations, Kohler recommends incorporating a Sioux Chief 652-AD vacuum breaker arrestor (or equivalent) near the valve outlet to prevent backflow. This step is crucial for maintaining water purity and adhering to plumbing codes; Ensure the valve body is flush with the finished wall surface, allowing for proper escutcheon plate installation later.
Pay close attention to the valve’s depth within the wall; insufficient depth can hinder escutcheon plate fitting, while excessive depth may cause operational issues. Refer to the specific model’s installation guide for precise depth requirements.
Step 2: Connecting Water Lines
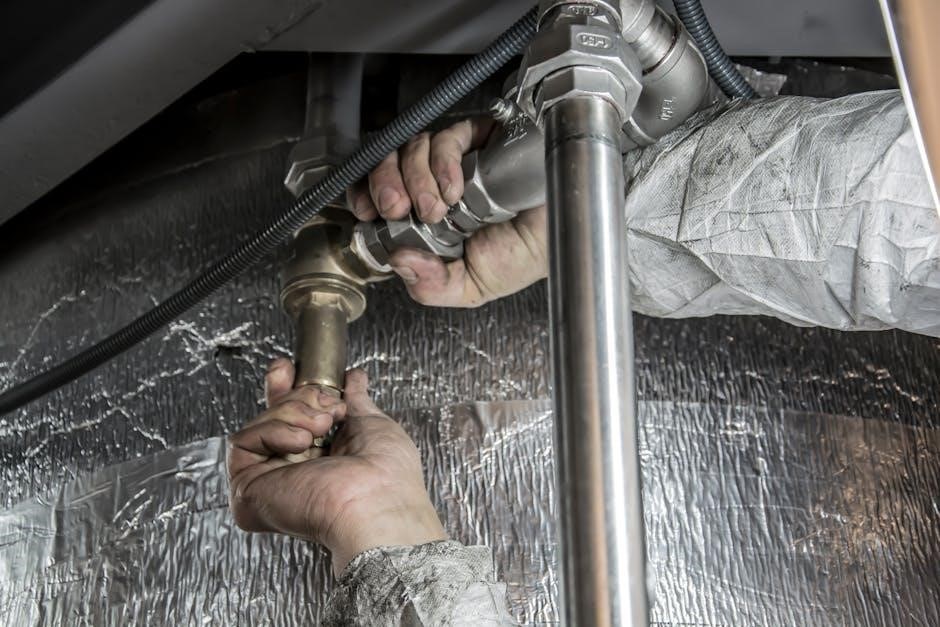
With the valve body securely installed, proceed to connect the hot and cold water supply lines. Utilize appropriate connectors – typically copper, PEX, or CPVC – ensuring compatibility with your existing plumbing system. Apply pipe thread sealant to all threaded connections to prevent leaks.
Carefully align the water lines with the valve body inlets, tightening the connectors firmly but cautiously to avoid cross-threading or damage. Verify the hot and cold water lines are connected to the correct inlets, referencing the valve’s markings or installation diagram.
After connecting the water lines, gently tug on each connection to confirm a secure fit. Inspect the connections for any visible gaps or misalignment. If using compression fittings, ensure the compression sleeves are properly seated and tightened.
Before proceeding, briefly open the water supply valves to check for any immediate leaks around the connections. Address any leaks promptly by tightening the connectors or reapplying sealant. Remember to shut off the water supply again before continuing with the installation.
Step 3: Installing the Escutcheon Plate
Once the water lines are securely connected, the escutcheon plate can be installed. This plate covers the valve body and creates a finished appearance. Carefully slide the escutcheon plate over the valve stem and align it with the wall surface.
Ensure the escutcheon plate is centered and level before securing it. Some models utilize screws to fasten the plate to the valve body or wall studs. Tighten the screws gently to avoid damaging the plate or the surrounding tile.
If the escutcheon plate has a gasket or rubber seal, ensure it is properly positioned to prevent water from seeping behind the plate. For larger escutcheon plates, you may need assistance to hold it in place while securing it.
Double-check that the escutcheon plate is flush against the wall and that all screws are tightened securely. A properly installed escutcheon plate will enhance the aesthetic appeal of your Kohler shower and provide a watertight seal.
Specific Kohler Valve Models & Installation
This section details installation procedures for popular Kohler valve models, including Rite-Temp, Purist, and DTV digital systems. Each model has unique steps and considerations for optimal performance.
Kohler Rite-Temp Valve Installation
The Kohler Rite-Temp K-304 shower valve is renowned for its reliable temperature control. Installation begins with carefully installing the valve body, ensuring proper alignment within the shower wall. Connecting the hot and cold water lines is crucial, utilizing appropriate fittings and applying pipe thread sealant to prevent leaks.
Specifically, when servicing this model, refer to guides detailing the mixer cap (GP77759) and pressure balancing unit (PBU). These components are vital for maintaining consistent water temperature. After connecting the water lines, install the escutcheon plate, securing it firmly against the wall.
Kohler recommends installing a Sioux Chief 652-AD vacuum breaker arrestor, or equivalent, near the valve outlet for added protection. Thoroughly test the valve for leaks after installation, checking all connections. Adjust the temperature and pressure to your desired settings, verifying the pressure balancing unit functions correctly. Remember to consult the official Kohler installation and care guide (1110626-2-K) for detailed diagrams and safety instructions.
Kohler Purist Valve Installation
The Kohler Purist valve, known for its minimalist design, requires precise installation for optimal performance. Begin by carefully mounting the valve body, ensuring it’s flush with the finished wall surface – a key aesthetic element of the Purist line. Securely connect the hot and cold water lines, utilizing appropriate connectors and sealant to guarantee a watertight seal.
Pay close attention to the alignment of the escutcheon plate, as its clean lines are central to the Purist’s visual appeal. Ensure it sits perfectly against the wall, concealing all plumbing connections. After installation, rigorously test for leaks around the valve body and connections.
Adjust the water temperature and pressure to achieve your preferred shower experience. Refer to Kohler’s comprehensive installation guides for detailed diagrams and troubleshooting tips. Remember to prioritize safety throughout the process, following all provided warnings and cautions. Proper installation ensures the Purist valve delivers both functional excellence and its signature understated elegance.
Kohler Digital Shower Valve (DTV) Installation
Installing a Kohler Digital Shower Valve (DTV) is more complex than traditional valves, demanding meticulous attention to detail. Begin by carefully mounting the control panel and valve body, ensuring proper alignment and secure attachment to the wall. Wiring is critical; connect all cables according to the provided wiring diagram, paying close attention to grounding requirements.
The DTV system often requires a dedicated power supply – verify correct voltage and amperage. Connect the water lines, ensuring watertight seals, and then proceed with the installation of the showerhead and any additional components like body sprays. After completing the physical installation, power on the system and follow the on-screen prompts to configure the personalized settings.
Thoroughly test all functions, including temperature control, spray patterns, and any integrated music or lighting features. Consult Kohler’s online resources and video guides for assistance with troubleshooting and advanced customization. Proper installation unlocks the full potential of the DTV system, delivering a luxurious and technologically advanced showering experience.
Post-Installation Checks & Troubleshooting
After installation, meticulously check for leaks around connections and the valve body. Adjust temperature and pressure for optimal comfort, referencing the manual. Address common issues like drips or inconsistent water flow promptly.
Testing for Leaks
Following the installation of your Kohler shower valve, a thorough leak test is paramount to ensure a secure and functional system. Begin by carefully inspecting all connections – where the water lines connect to the valve body, around the escutcheon plate, and at the showerhead itself. Turn the water supply back on slowly, allowing pressure to build gradually.
Visually examine each connection point for any signs of dripping or moisture. Use a dry cloth to wipe around the fittings; even a small amount of dampness indicates a potential leak. Pay close attention to the valve stem and handle area, as these are common leak points. If leaks are detected, immediately shut off the water supply and tighten the connections further.
If tightening doesn’t resolve the issue, disassemble the connection, inspect the threads for damage, and reapply plumber’s tape or sealant before reassembling. Run the shower at various temperatures and flow rates, continuing to monitor for leaks. A persistent leak may indicate a faulty valve component or improper installation, requiring professional assistance. Don’t ignore even minor leaks, as they can lead to water damage and costly repairs over time.
Adjusting Temperature and Pressure
Once the leak test is successfully completed, proceed to adjust the temperature and pressure to your desired settings. For Kohler Rite-Temp valves, a rotational limit stop controls the maximum hot water temperature, preventing scalding. Carefully adjust this stop to a comfortable and safe temperature, typically around 120°F (49°C).
Test the temperature throughout the full range of handle motion, ensuring it remains within a safe and comfortable zone. If the water temperature fluctuates excessively, it may indicate an issue with the pressure balancing unit, requiring further investigation. Adjusting the showerhead’s flow restrictor can modify the water pressure.
For Kohler digital shower valves (DTV), temperature and pressure are controlled electronically through the system’s interface. Familiarize yourself with the DTV’s settings menu to customize your showering experience. Ensure the system is properly calibrated for accurate temperature readings. Regularly check and adjust these settings to maintain optimal comfort and efficiency.
Troubleshooting Common Issues
If you encounter issues post-installation, begin by re-checking all connections for tightness and proper alignment. A persistent leak often indicates a loose fitting or damaged O-ring. For reduced water flow, inspect the showerhead for mineral buildup and clean accordingly. If the temperature fluctuates wildly, the pressure balancing unit might be faulty and require replacement.
Digital shower valves (DTV) may present unique challenges. Error codes displayed on the interface should be referenced in the DTV’s specific troubleshooting guide. Power cycling the system can often resolve minor glitches. If the valve doesn’t respond, verify the power supply and wiring connections.
For Rite-Temp valves, a stiff or unresponsive handle could indicate a worn cartridge. Always consult the Kohler documentation for specific error diagnostics and recommended solutions. If you are uncomfortable addressing these issues, contact a qualified plumber for assistance.
Maintenance and Care
Regular cleaning with mild detergents preserves the finish. Periodically replace cartridges to maintain optimal performance. Winterizing prevents damage from freezing temperatures, ensuring longevity.
Cleaning Instructions
Maintaining the pristine appearance of your Kohler shower valve is surprisingly simple with consistent, gentle care. Avoid abrasive cleaners, scouring pads, or harsh chemicals, as these can damage the finish and compromise the valve’s integrity. Instead, opt for a mild soap solution – think dish soap diluted in warm water – and a soft cloth.
Regularly wipe down the escutcheon plate and handle with this solution to remove water spots, soap scum, and mineral deposits. For stubborn buildup, allow the soapy water to sit for a few minutes before gently scrubbing. Rinse thoroughly with clean water and dry with a separate soft cloth to prevent watermarks.
Pay particular attention to areas around the valve stem and any textured surfaces, as these tend to accumulate grime. When cleaning around the handle, ensure the valve is in the off position to avoid accidental activation. For valves with special finishes, such as polished brass or oil-rubbed bronze, consult Kohler’s specific care guidelines to preserve their unique luster.
Remember, preventative maintenance is key. A quick wipe-down after each shower can significantly reduce the need for more intensive cleaning later on, keeping your Kohler shower valve looking its best for years to come.
Replacing Cartridges
Over time, shower valve cartridges can wear out, leading to dripping, inconsistent temperature control, or difficulty adjusting water flow. Replacing a Kohler cartridge is a manageable DIY task, but requires careful attention to detail. First, shut off the water supply to the shower – a crucial safety step!
Remove the handle, escutcheon plate, and retaining clip to access the cartridge. Use a cartridge puller tool (highly recommended) to gently extract the old cartridge; forcing it can damage the valve body. Before installing the new cartridge, inspect the valve body for any debris or corrosion, cleaning it thoroughly if necessary.
Lubricate the O-rings on the new cartridge with silicone grease (plumber’s grease) to ensure a smooth fit and prevent leaks. Align the cartridge correctly – often indicated by a specific orientation – and insert it firmly into the valve body. Reinstall the retaining clip, escutcheon plate, and handle.
Finally, slowly turn the water supply back on and test the valve for proper operation and leaks. If issues persist, double-check the cartridge installation and ensure all components are securely in place.
Winterizing Your Shower Valve
Protecting your Kohler shower valve from freezing temperatures is essential, especially in colder climates, to prevent costly damage. Before winter arrives, thoroughly drain the valve and associated plumbing lines. Begin by shutting off the water supply to the shower.
Next, open the shower valve to allow any remaining water to escape. For valves with remote controls, follow the manufacturer’s instructions for draining those components as well. Consider using compressed air to blow out any residual water from the lines – exercise caution to avoid excessive pressure.
If your shower system includes a mixing valve, ensure it’s also drained. Kohler recommends installing a vacuum breaker arrestor, like the Sioux Chief 652-AD, near the remote valve outlet for added protection. Insulate exposed pipes to further minimize the risk of freezing.
Regularly check for leaks during the winter months. When spring arrives, slowly restore the water supply and inspect the valve for any signs of damage before resuming normal use.